


How To Fix Interlink Verification Errors & Secure Your Account (2026 Guide)
Aug 18, 2026
Technology
Are face-scan failures or app glitches locking you out of mining $ITLG? The short answer is almost never. Most Interlink verification errors come from lighting, camera permissions, or temporary network lag not from a banned account. This complete 2026 guide shows you exactly how to fix Interlink verification errors and how to properly secure your account: everyday app protection plus 2FA set up only when preparing to migrate ITLG.
What are common Interlink verification errors and how to fix them?
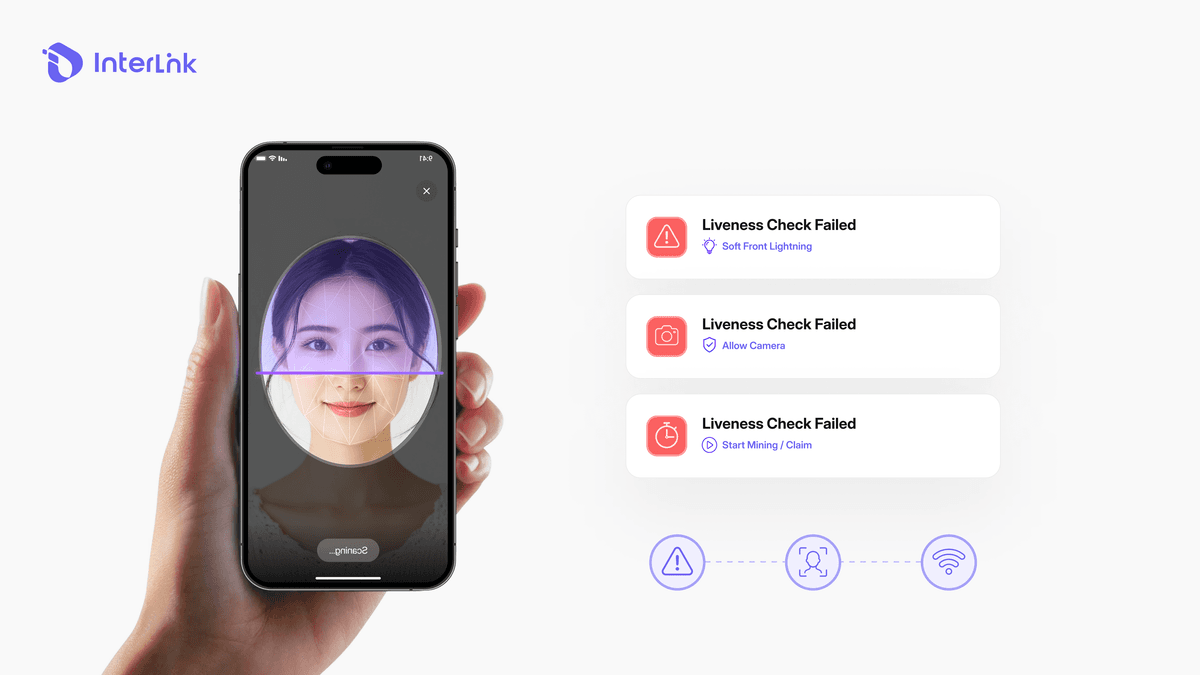
Interlink uses biometric liveness detection to confirm you are a real, unique human. When the scan fails, the cause is usually environmental or technical - not a system rejection of your identity. Here are the three most frequent errors and the exact fixes:
- Liveness Check Failed
- Cause: Poor lighting, face partially covered, moving too fast, or wearing glasses/hat.
- Fix: Stand in soft front lighting (natural window light works best). Remove glasses, hats, and heavy makeup. Hold the phone at eye level, keep a neutral expression, and follow the on-screen head movements slowly. Clean the front camera lens with a microfiber cloth before starting.
- Camera Black Screen or Frozen
- Cause: Camera permission denied, another app using the camera, or temporary system conflict.
- Fix: Go to phone Settings → Apps → Interlink → Permissions → allow Camera. Force-close all other camera apps (Zoom, WhatsApp, etc.). Restart your phone completely, then reopen Interlink and try again.
- 4-Hour Check-in Session Timeout
- Cause: App running in background too long, unstable internet, or delayed claim.
- Fix: Open the app fully every 4 hours and tap “Start Mining / Claim” within the active window. Switch to a stable Wi-Fi or 4G/5G connection. Clear the app cache (Settings → Apps → Interlink → Storage → Clear Cache) if the timer freezes.
Key Concept: Biometric Liveness Detection vs. Static Photo Verification
Liveness detection requires real-time movement (blink, turn head, smile) to prove a living person is present. A static photo or pre-recorded video will always fail. This protects the network from bots and deepfakes while keeping the process lightweight for your phone.
Setup Note: Always perform the scan in a well-lit indoor environment. Avoid strong backlights or very dark rooms.
How to Secure Your Interlink Account
Interlink protects your account through two separate layers. Understanding the difference between them is important for proper account security.
Layer 1: Everyday App Security (Login Protection)
This layer protects your normal daily access to the Interlink app. It uses a combination of multiple factors to keep your Human Node secure during regular use. The everyday security factors include:
- Face verification (liveness check)
- Email verification
- Authenticator app (Google Authenticator or similar)
- Login ID
- Remembered password or PIN
These elements work together so that even if one factor is compromised, the others still protect your account during daily activities.
Layer 2: 2FA Specifically for ITLG Migration
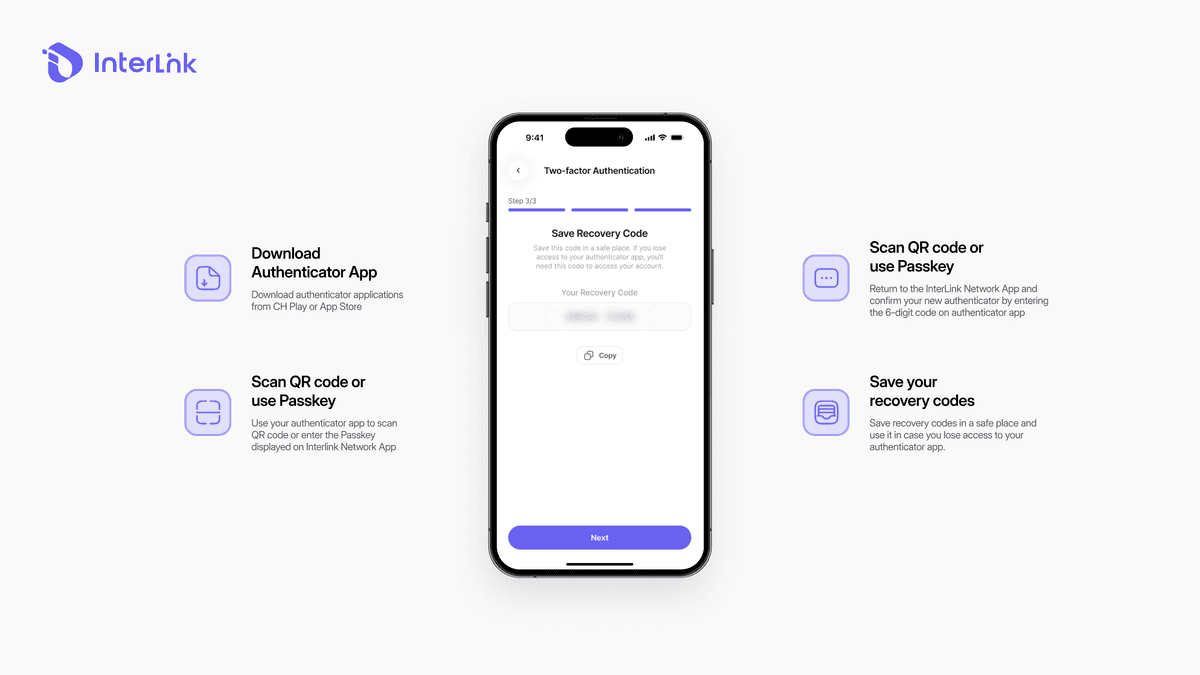
Starting from version 5.1, Two-Factor Authentication (2FA) was added to protect the migration of verified ITLG to the ITLX Wallet. This 2FA is not required for everyday login. It is only required when you prepare to migrate your tokens.
When you prepare to migrate ITLG:
- The system will require you to set up 2FA.
- You will scan a QR code or enter a key.
- You will verify a 6-digit code from your authenticator app.
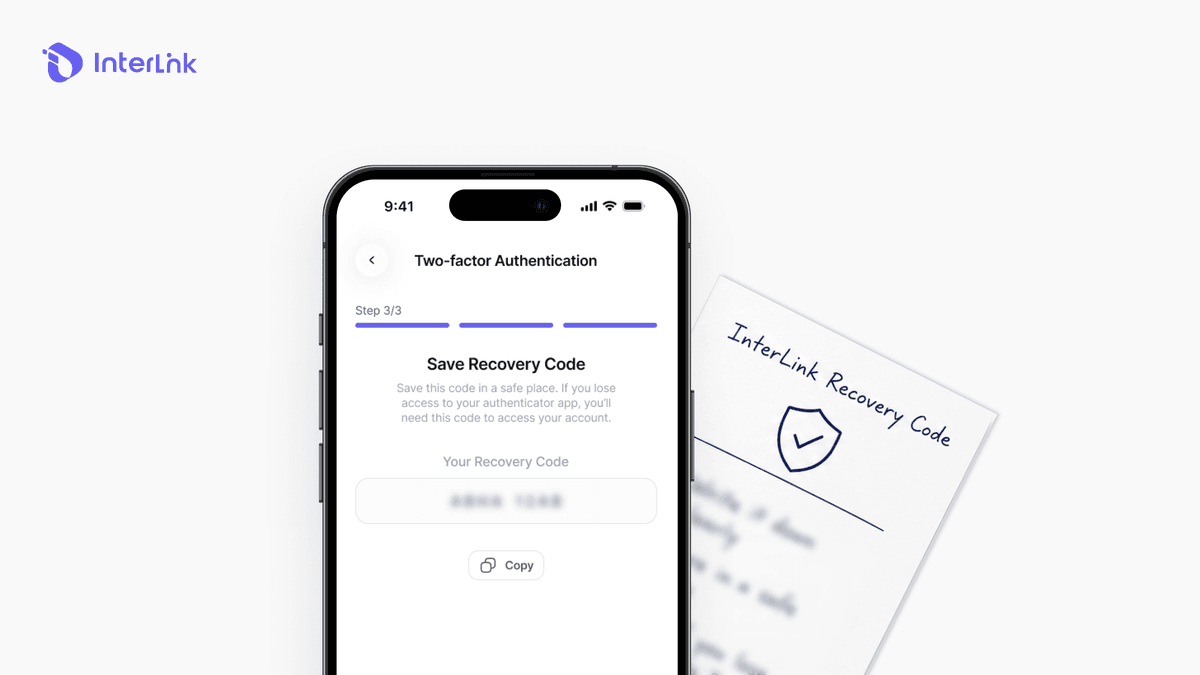
- You will receive a Recovery Code.
Why the Recovery Code is critical: If you lose your phone or the authenticator app during the migration process, the Recovery Code is the only way to complete or recover the migration step. Treat it like a private key.
How to Keep the Recovery Code Safe
Recommended methods:
- Write it on paper or engrave it on a metal plate.
- Keep at least two physical copies in different safe places, such as one at home and one with a trusted family member.
What to avoid:
- Never take a screenshot.
- Never save it in Notes, Google Drive, iCloud, Telegram, email, or any cloud service.
- Never share it with anyone.
Interlink support, ambassadors, or anyone claiming to help will never ask for your Recovery Code, 2FA codes, or login details. If someone does, it is a scam.
Key Concept: Interlink follows Self-Sovereign Identity principles. You alone control your Interlink ID, your everyday login credentials, and the 2FA Recovery Code used for migration. The project cannot reset or recover them for you. This gives you true ownership of your Human Node and ITLG, along with full responsibility to protect them.
How to safely restore your Interlink ID on a new smartphone?
You can move your entire Human Node to a new device without interrupting your HHP streak. Follow these steps carefully:
- Step 1: On the new phone, download the official Interlink app from Google Play or the App Store. Open the app and select “Restore / Import existing Interlink ID” or log in with your registered email.
- Step 2: Complete the multi-channel verification (Email OTP, Telegram code if linked, or Face ID/liveness check) to confirm you are the original owner. This uses the normal everyday app security layers.
- Step 3: Handle 2FA correctly (especially important if you are preparing for or in the middle of migration):
- If you still have access to the old authenticator app, enter the current 6-digit code.
- If you lost the old phone, use the 2FA Recovery Code that you saved when first enabling 2FA for migration.
- After successful login, immediately re-enable or transfer 2FA to the new device and save a new Recovery Code if you still need it for migration.
- Step 4: Complete a fresh liveness check to re-activate the Human Node. Your previous mining history and HHP multipliers remain intact once the process succeeds.
Important: Do not delete the old app until the new device has fully restored, completed at least one successful mining session, and 2FA (if needed for migration) is active again.
Conclusion
Most Interlink verification errors can be fixed in under five minutes with proper lighting, camera permissions, and a clean lens. Everyday security of your Interlink app relies on face verification + email + Google Authenticator + Login ID + remembered password/PIN.
2FA is set up specifically when you prepare to migrate ITLG. The Recovery Code for that 2FA must be stored offline and never shared, because it is the only recovery method for the migration step.
Quick Security Checklist:
- Camera permission granted
- Front camera cleaned
- Soft front lighting used
- Everyday app security active (face + email + Google Authenticator + Login ID + remembered password/PIN)
- 2FA enabled only when preparing for ITLG migration
- 2FA Recovery Code written on paper/metal (never digital)
- Two physical backups in different locations
- Never shared the 2FA Recovery Code with anyone
Disclaimer: This guide from InterLink Labs is for educational purposes only. InterLink Labs support will never ask for your 2FA Recovery Code or login details. Always download the app from official stores and verify official announcements only through verified channels. Optimize your node efficiency and learn how to boost your Human Hash Power in Cluster 7.

